
This document describes the form validation process with the page builder on the server side. We've created a contact form initially and validated that.
To learn more about creating a contact form, read this document. You can watch a video of the form validated on this page or go through the document.
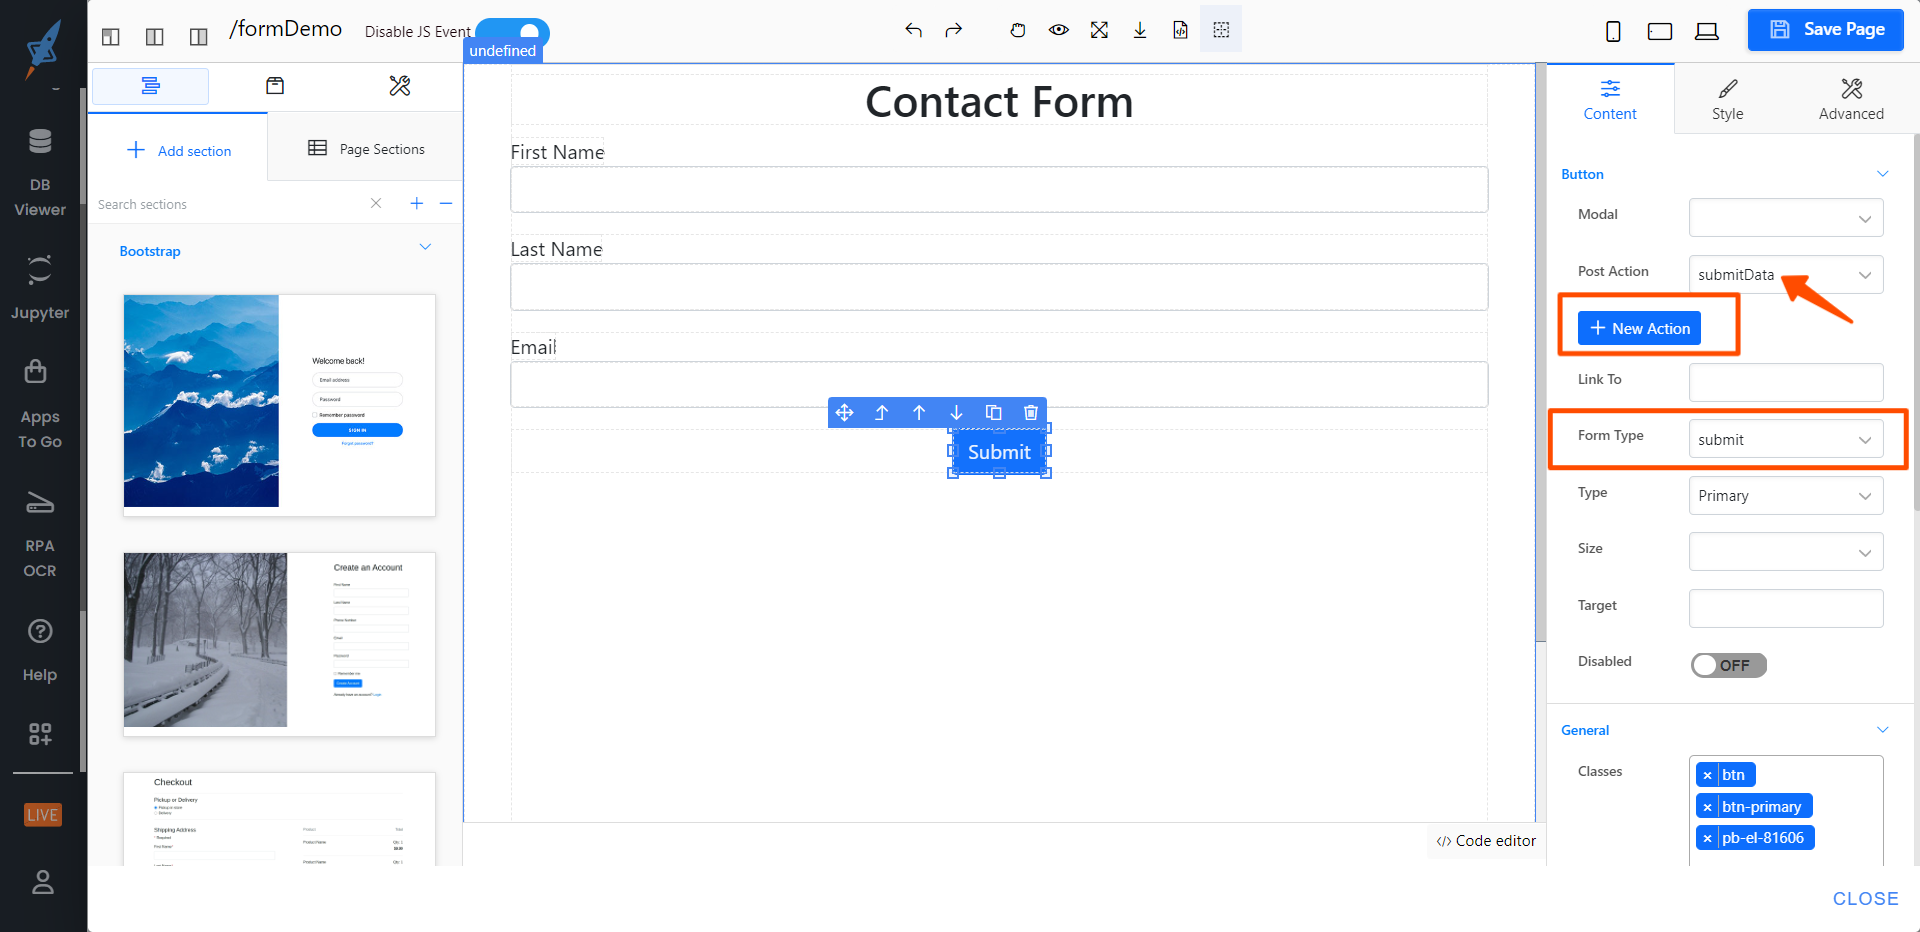
Step 1: The contact form is already created with the first name, last name, and email fields. Now, bind the submit event of the submit button and provide a form type submit there from the content tab of the right panel. Then save the page from the top right corner button click.
After saving the page, node flow will be injected for the submit form.
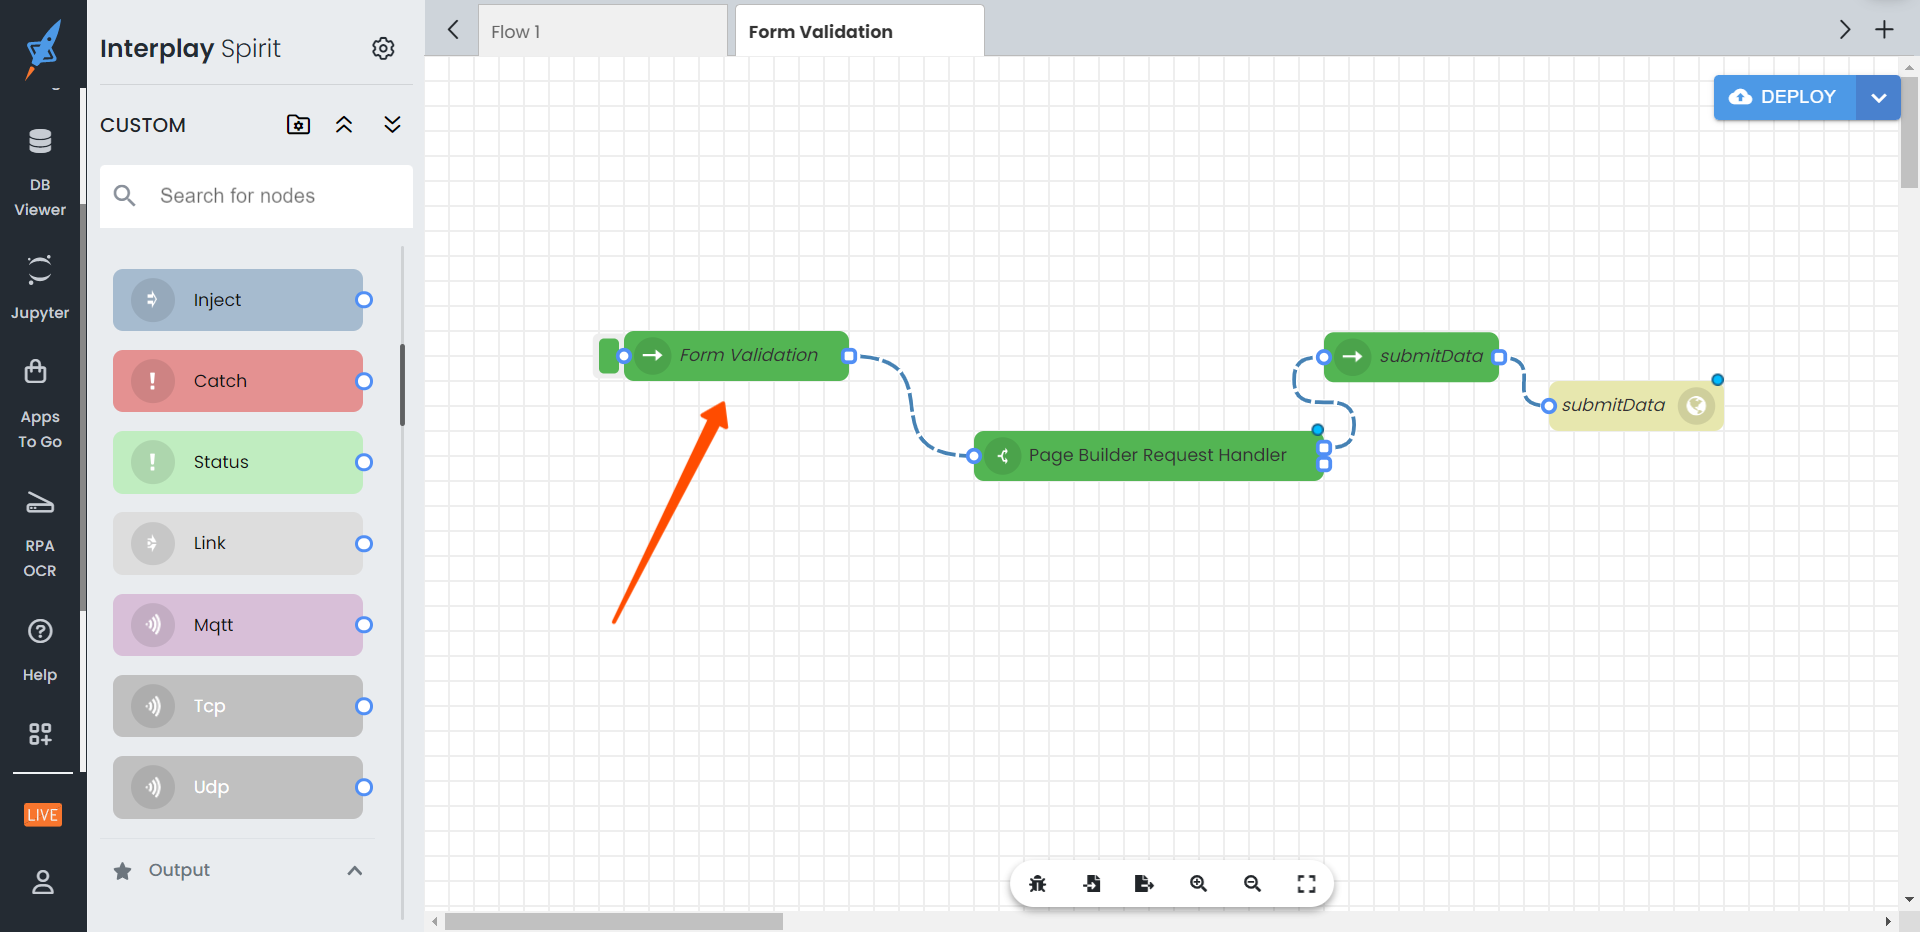
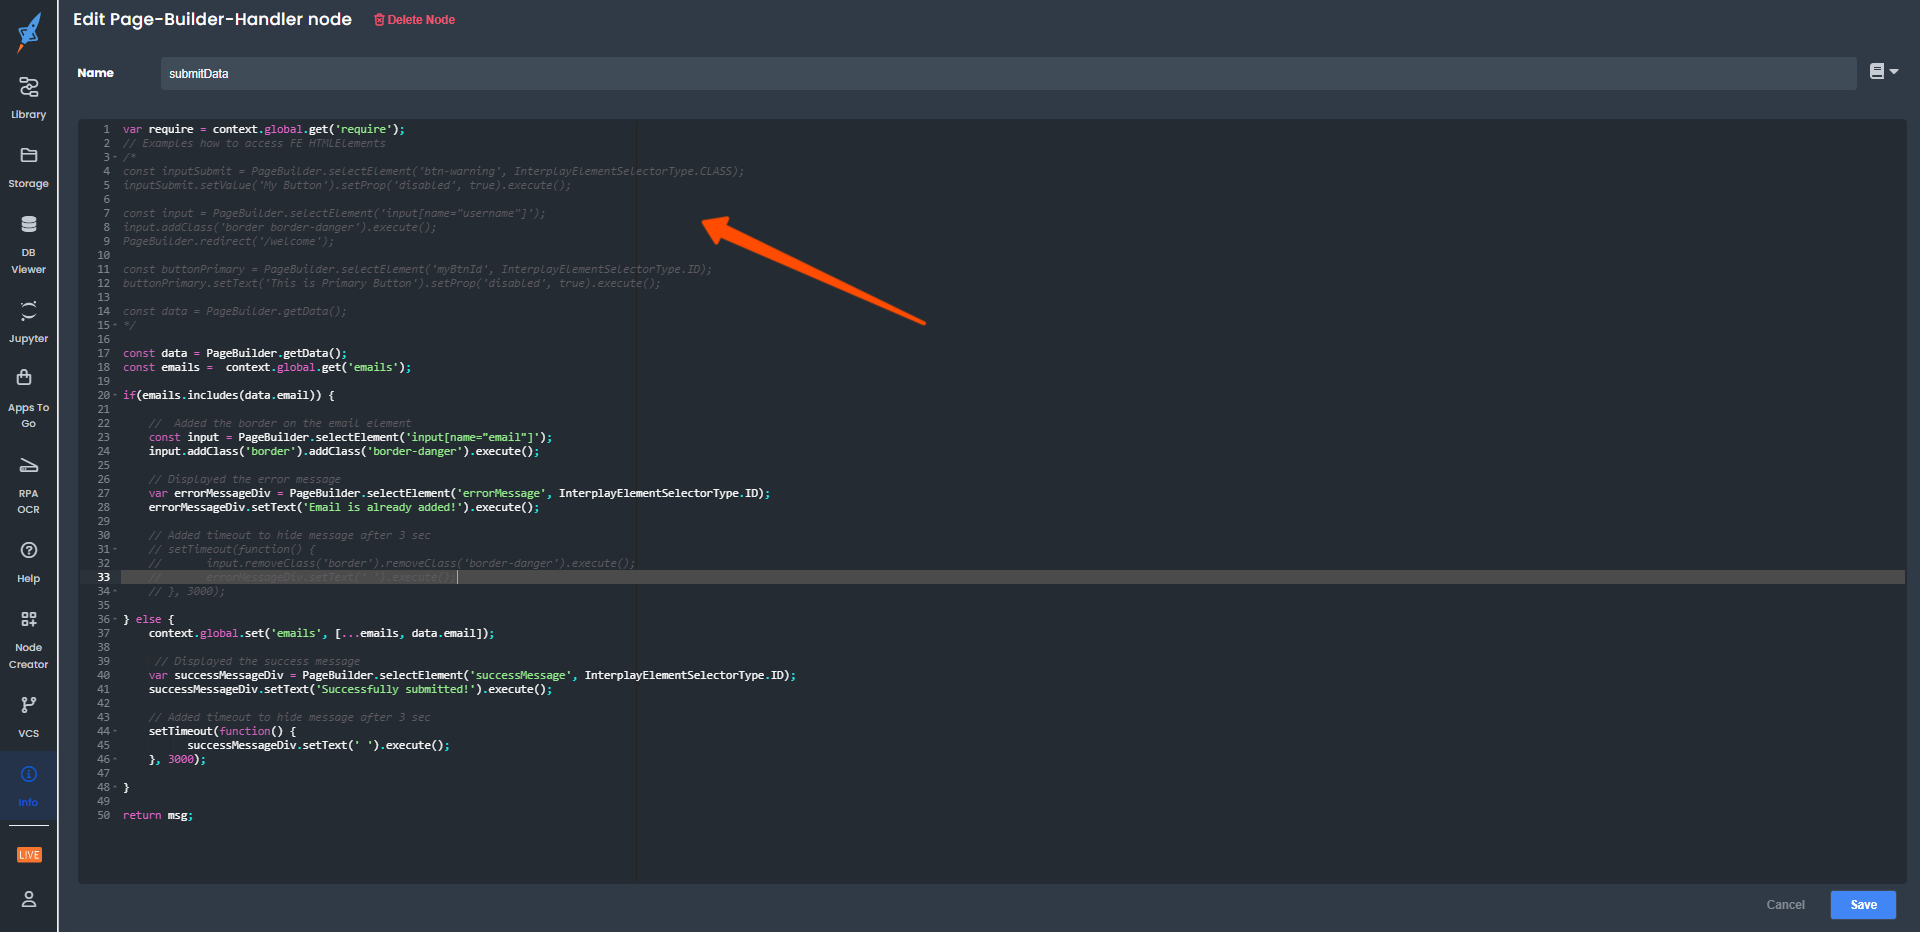
Step 2: Now update the 'submitData' node to validate the email field. Here, the emails are stored in the global context, and on every form submission, it is checked that the email has been added to the global context or is a new email.

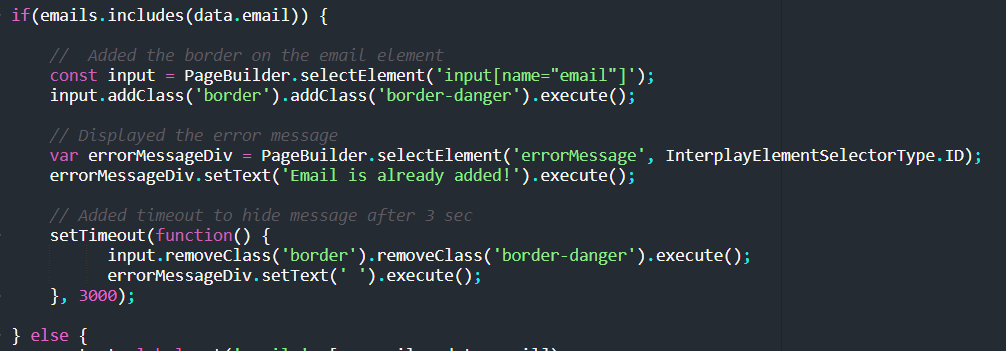
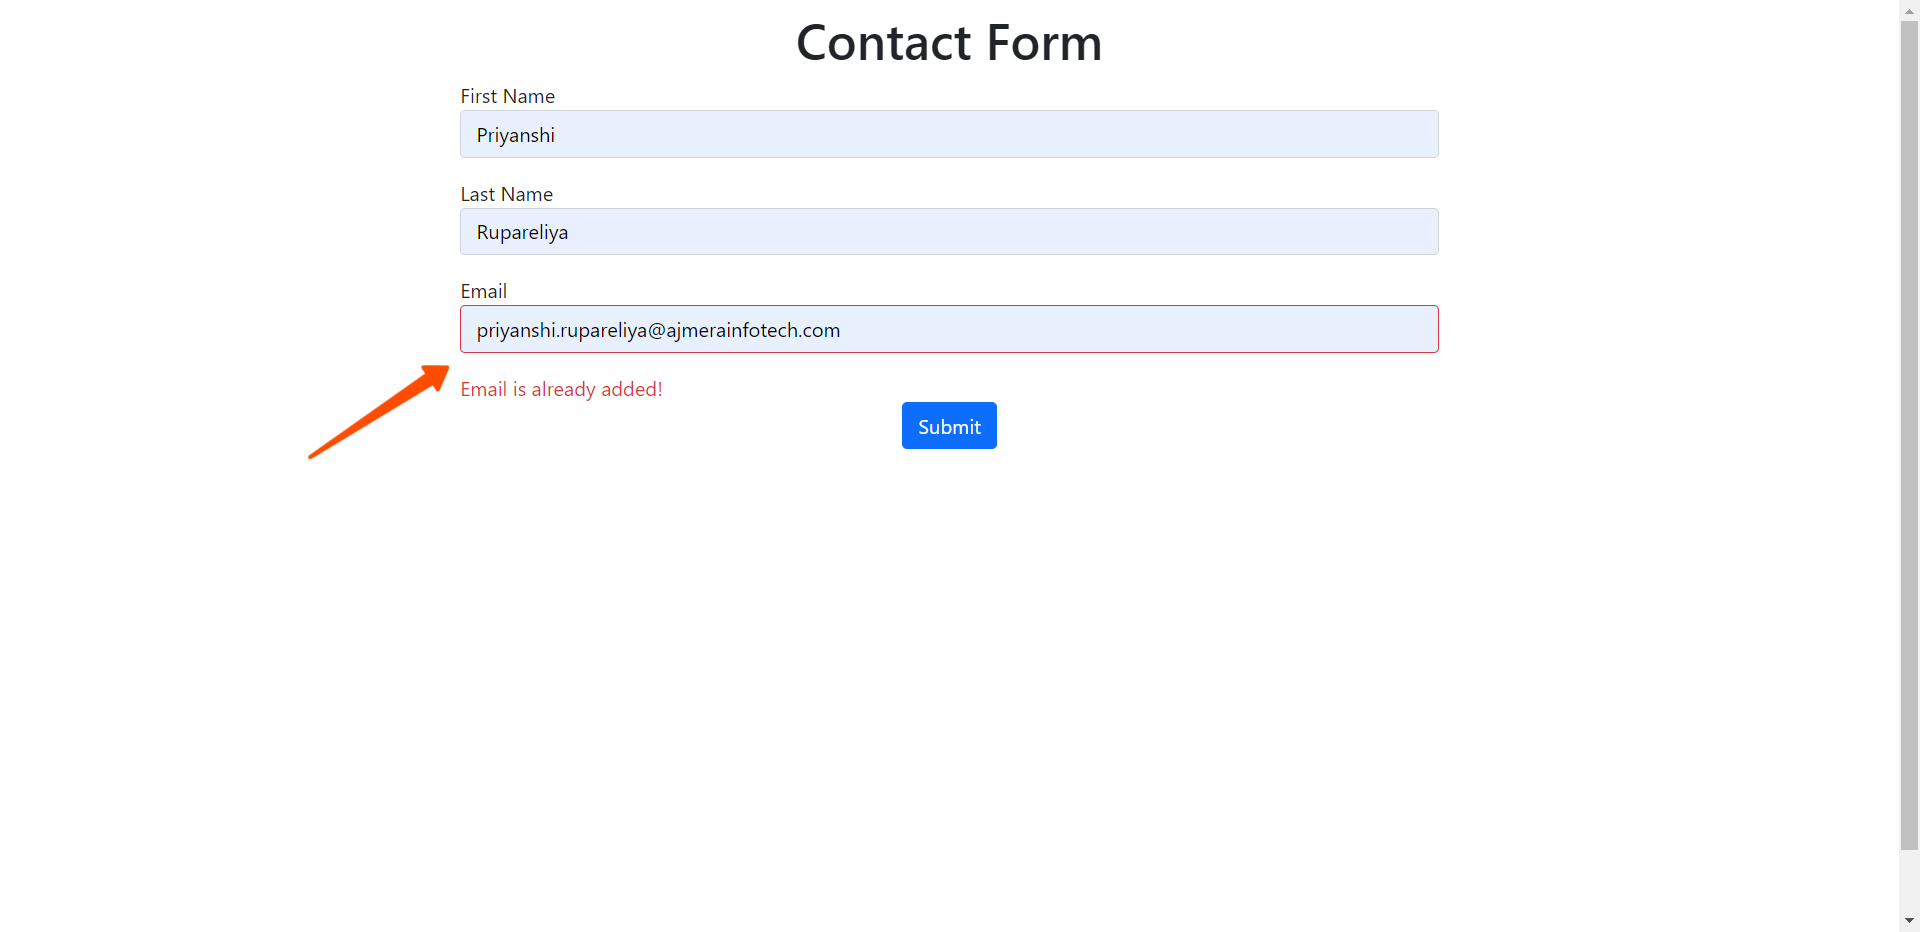
If it is an existing email, an error message "Email is already added!" and a red border is displayed on the email input element.
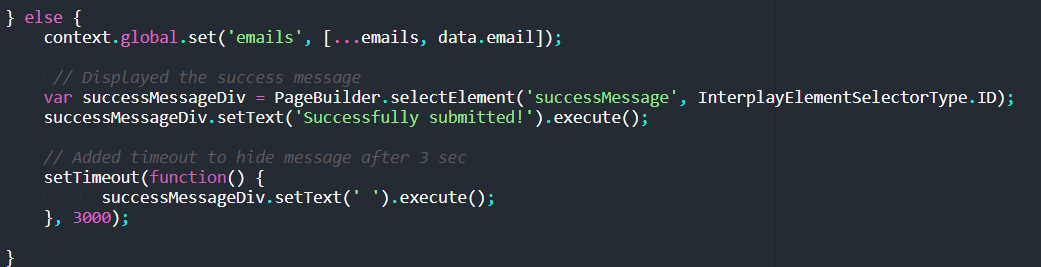
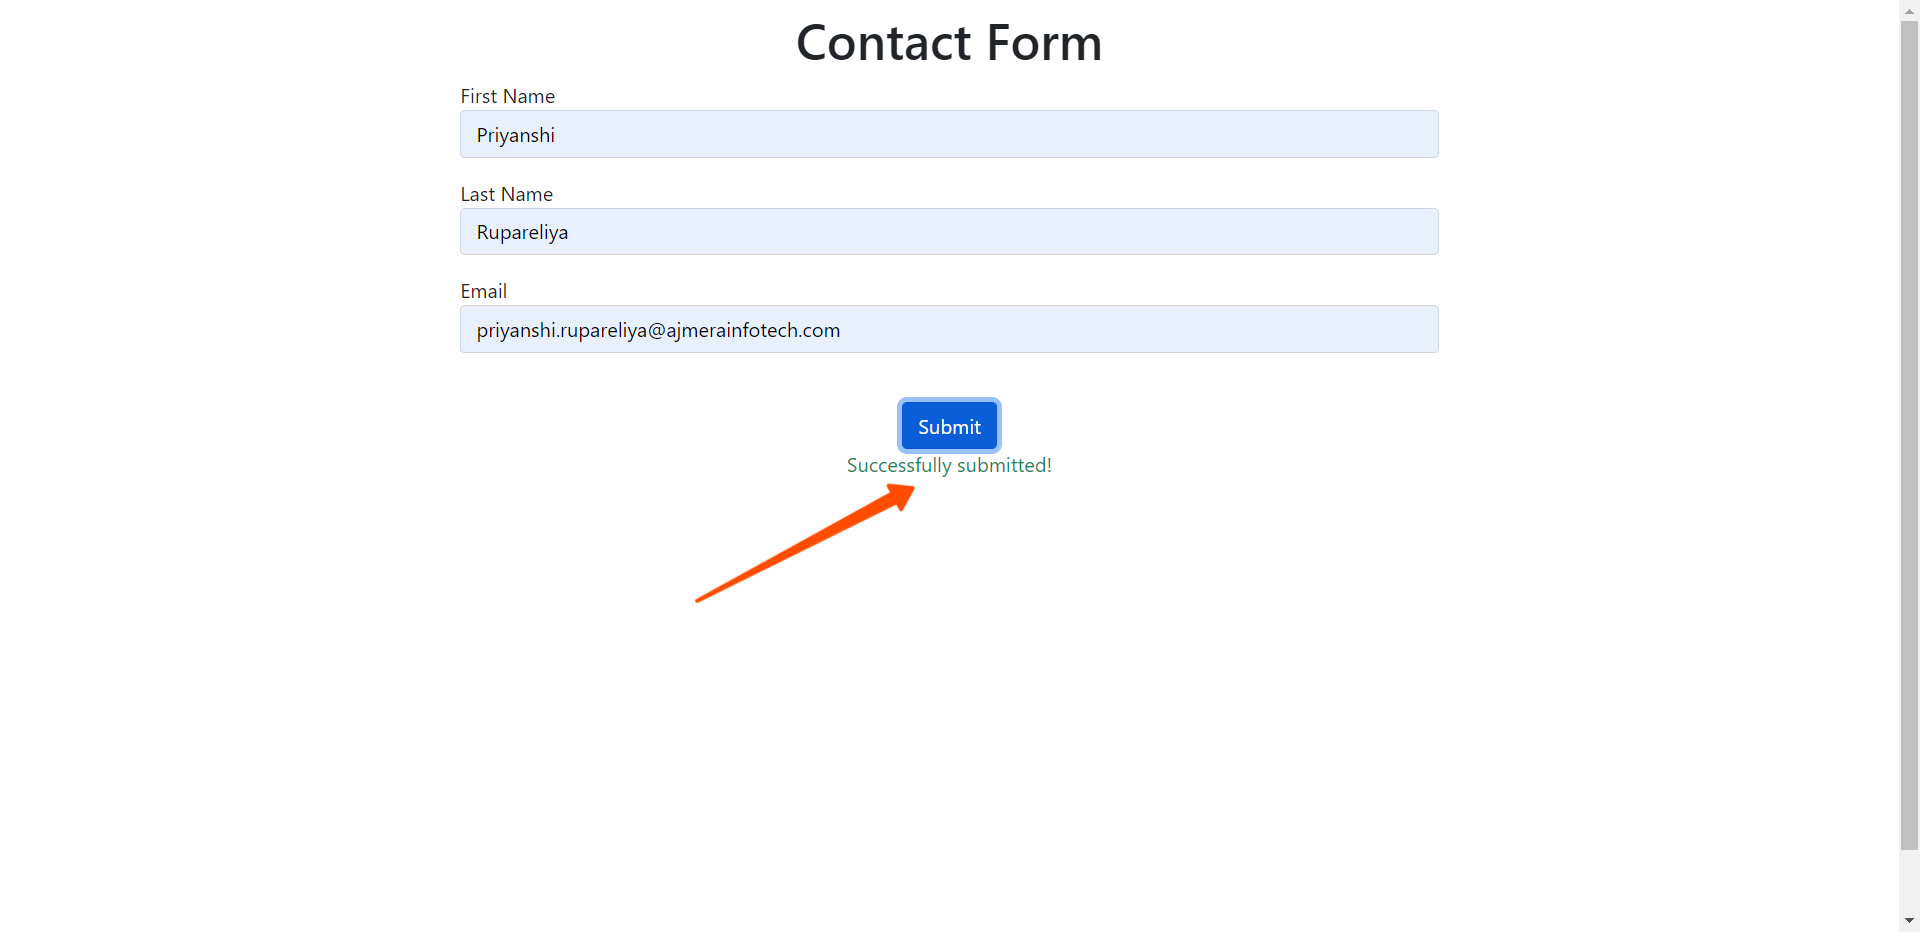
If it is a new email, a success message "Successfully submitted!" is displayed.
Take note that the basic code is already present in the node in the commented section.
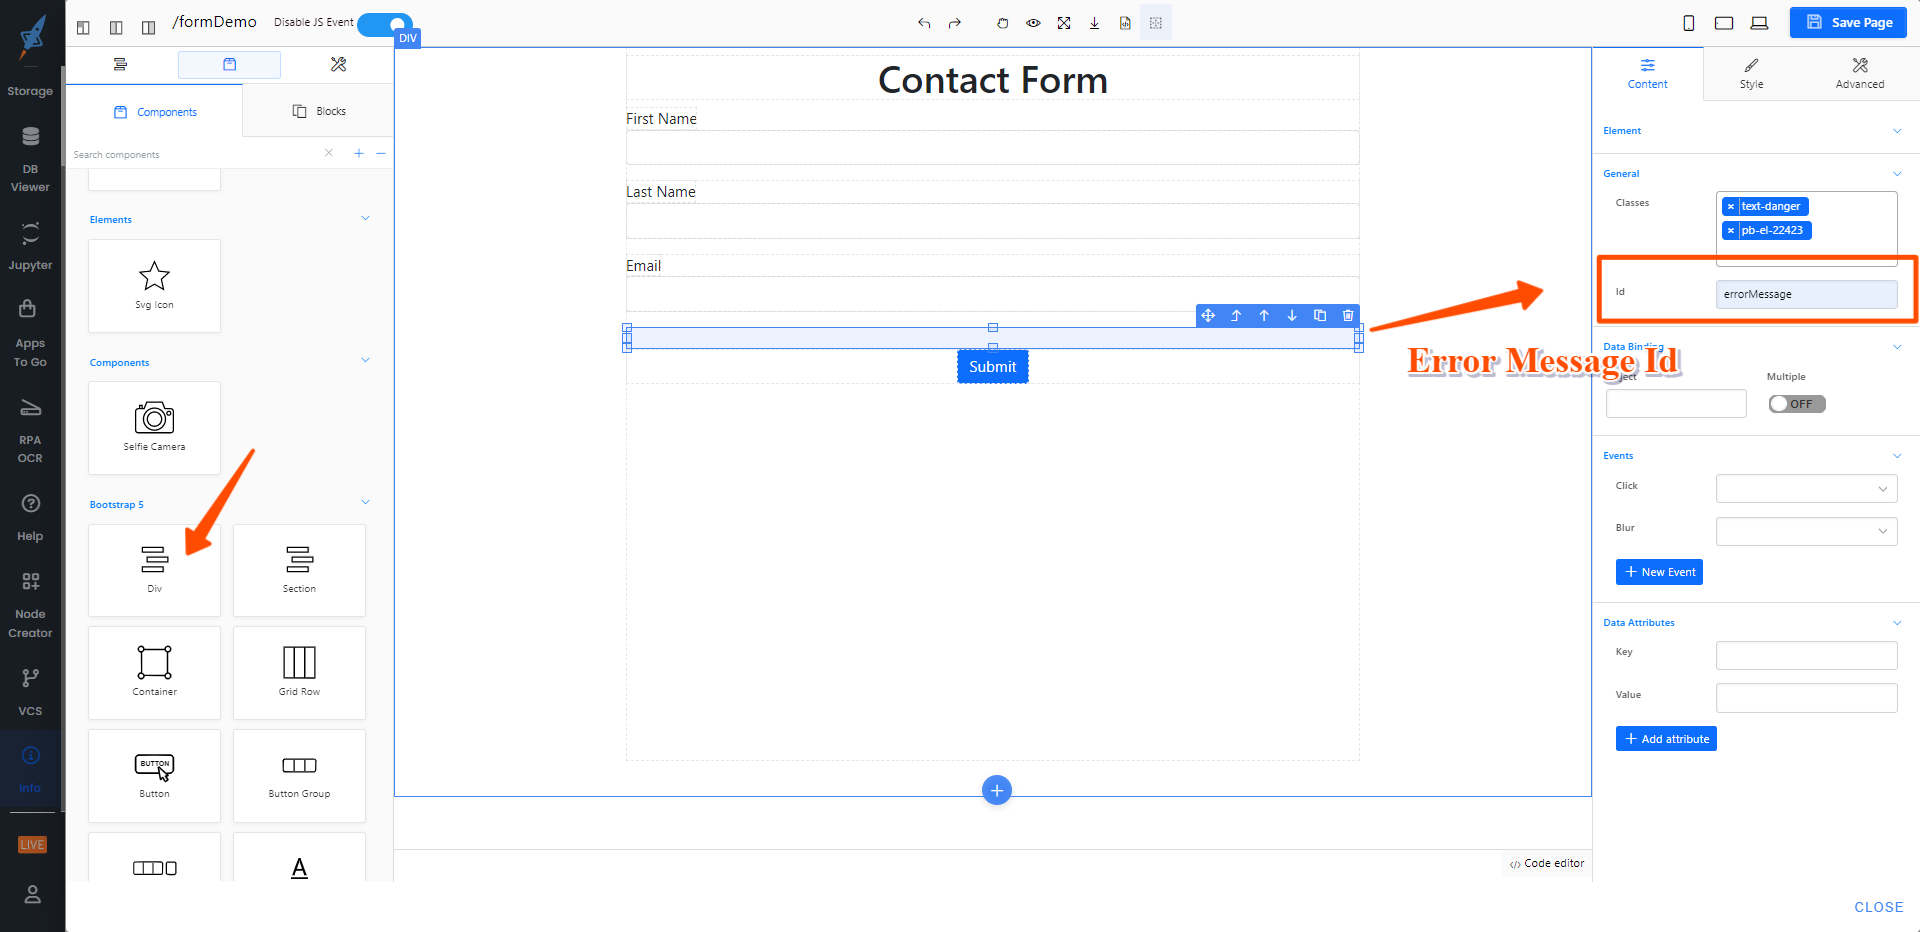
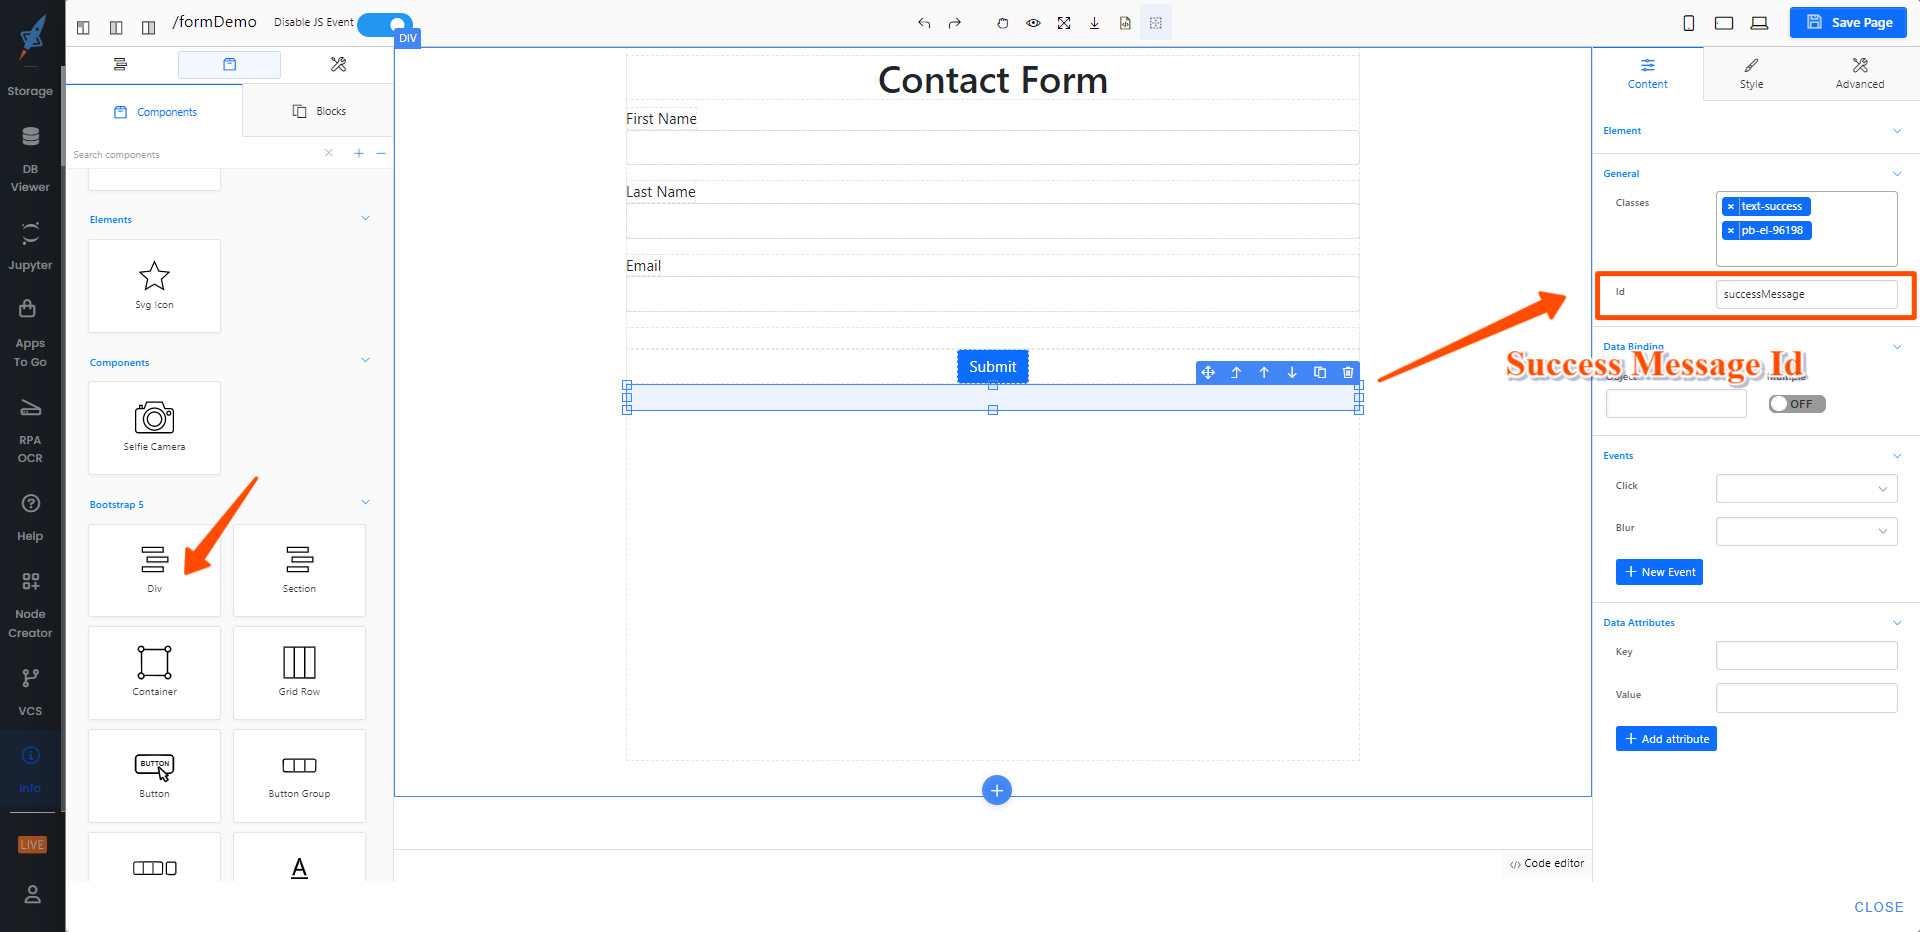
Step 3: To display the error and success messages, create a div in the layout and include the id from the content section that was used in the code.
Step 4: Run the node and submit the form by adding the same email twice so you can see the first time the success message and the second time the error message.
Video of validating the contact form