
This article discusses how to make a “Create an Account” page and a “log in” page using Page Builder.
Create an Account page
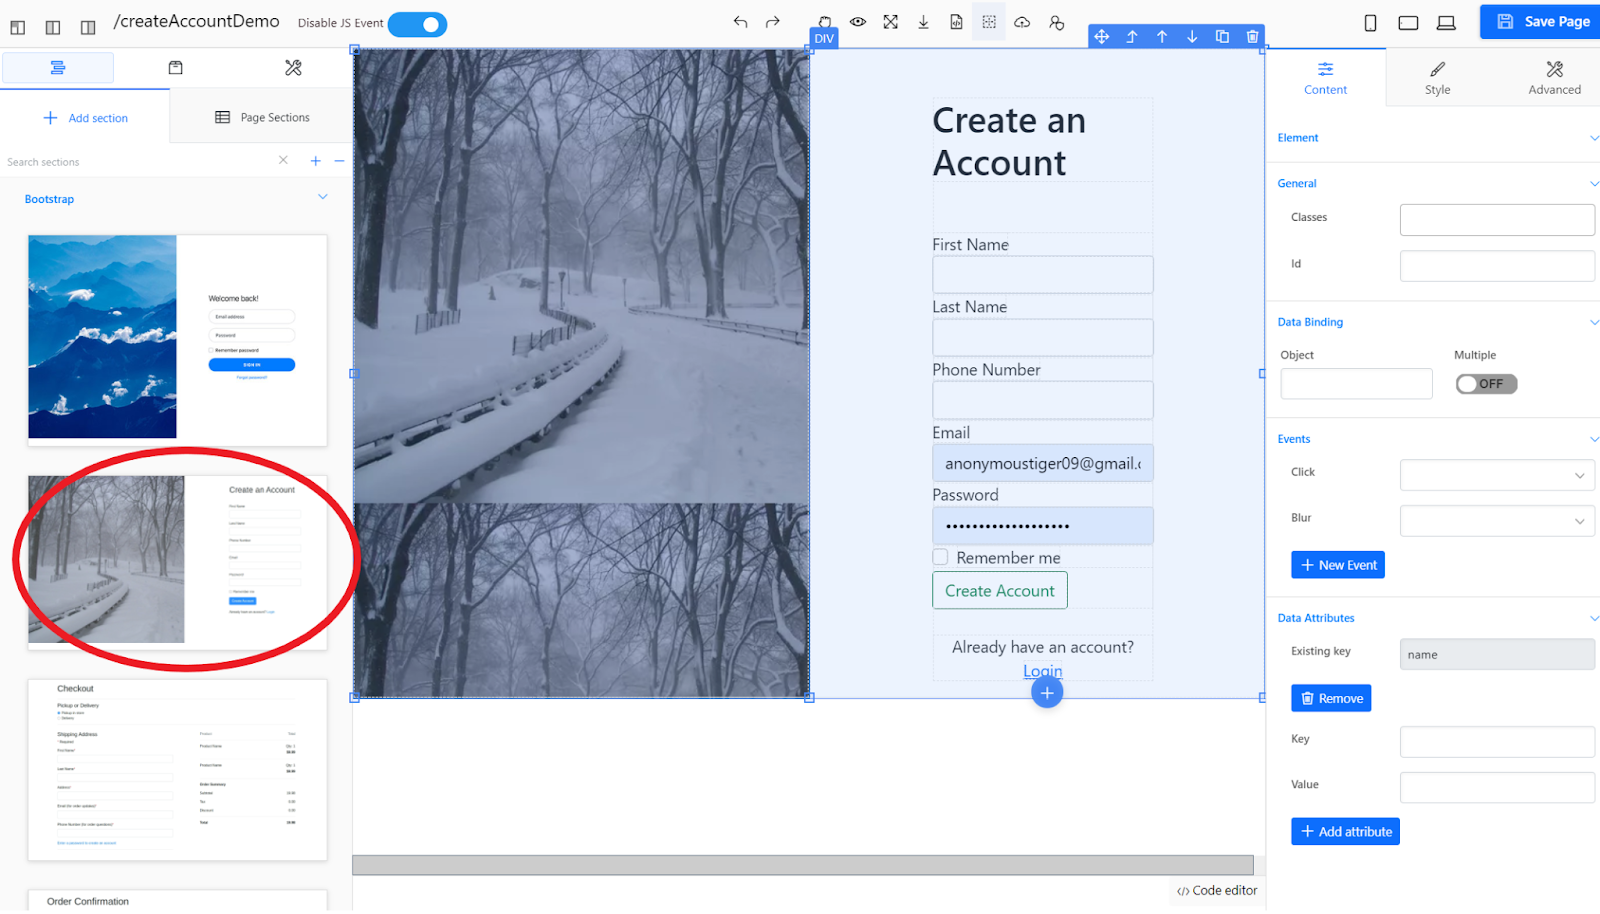
Step 1: Select a “Create an Account” page section from the “Add Section” tab. Add a “Name” attribute to each input box, as you will need it to access the data.
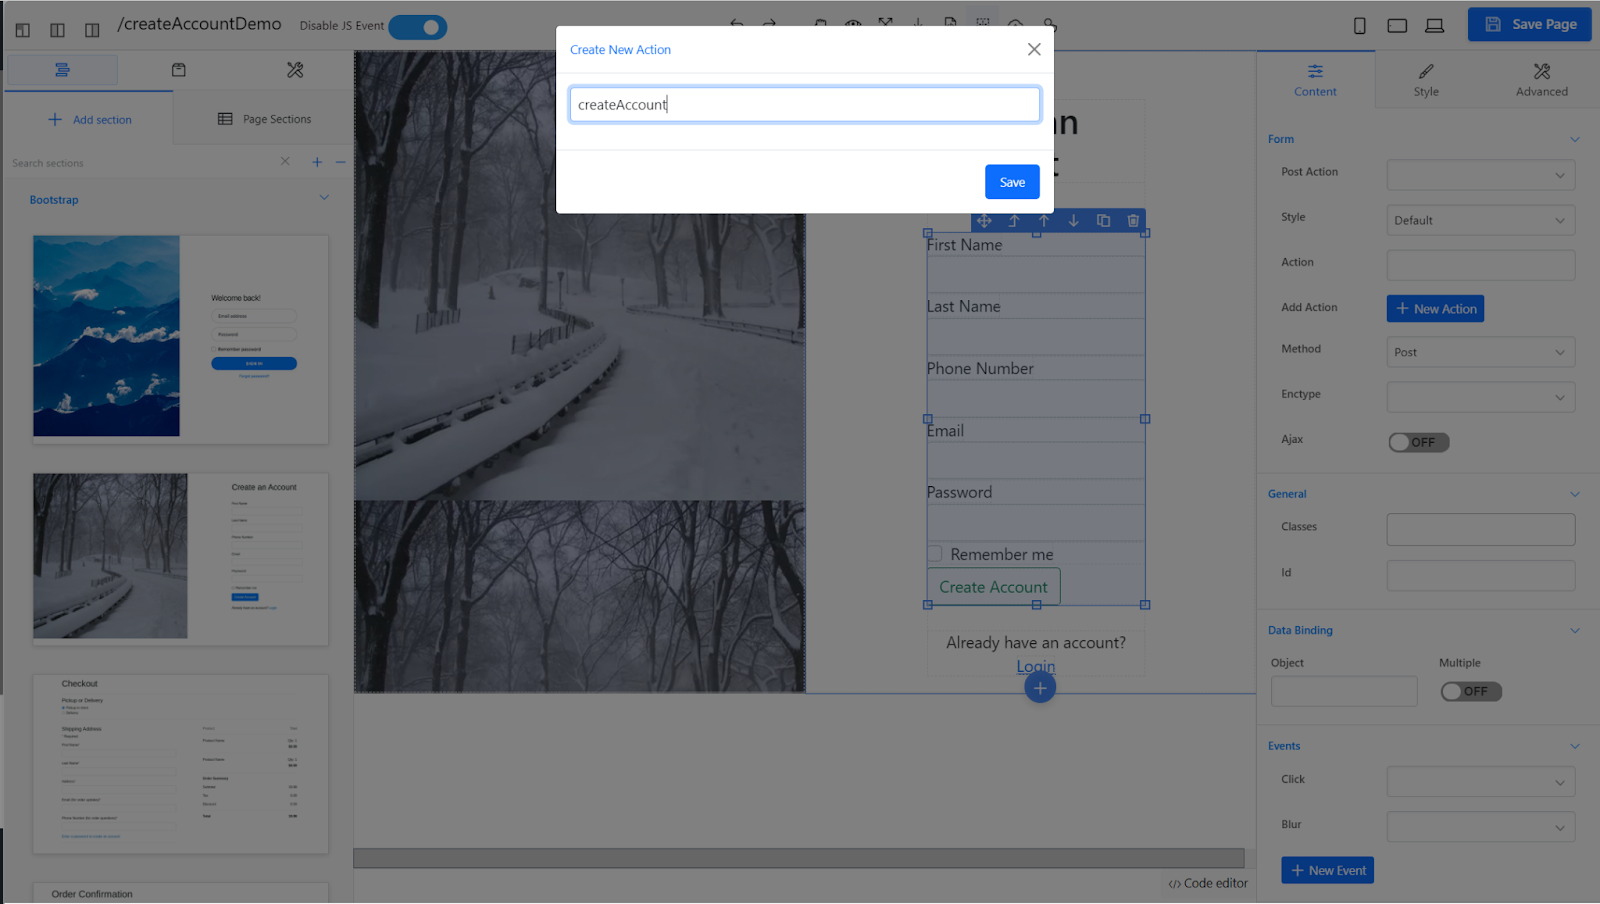
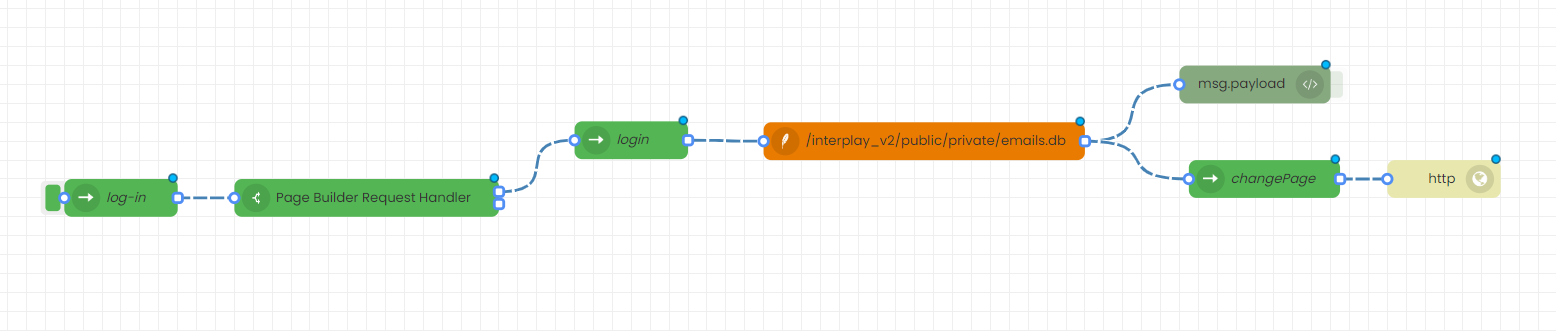
Step 2: Click on the form, then select “Add Action” to create a new action which gets the entered data and stores it in a database. Save the page, then click out of the page editor. You should see three new nodes connected to the Page Builder Node.

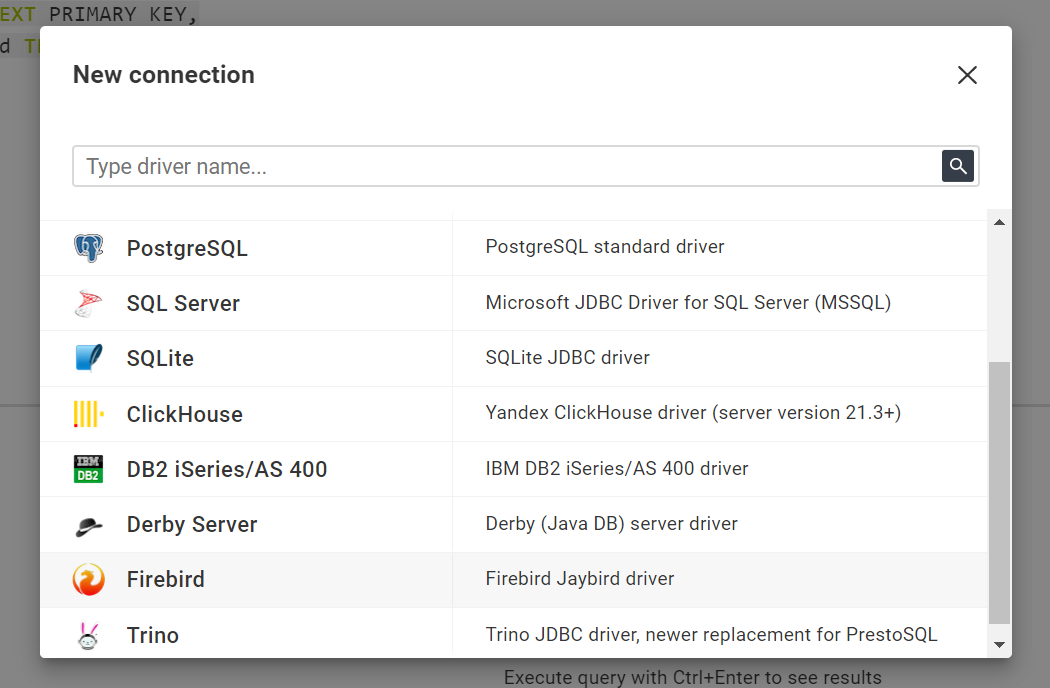
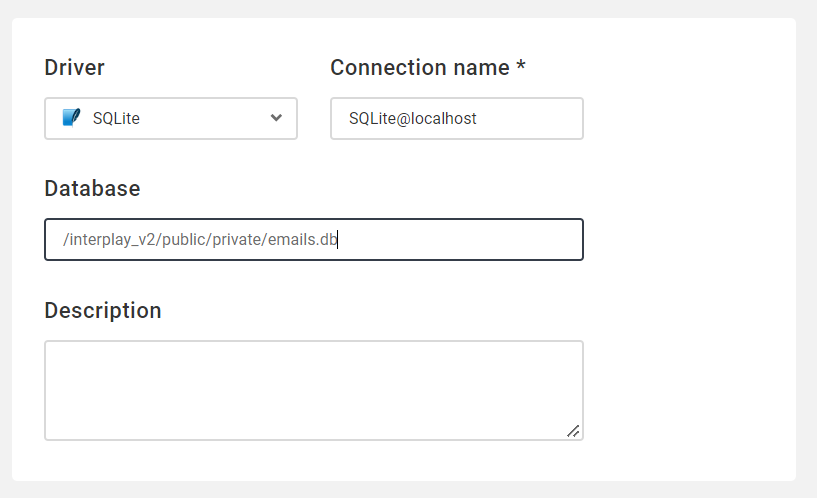
Step 3: Attach an SQLite node, followed by a Console node, at the end of the chain. Click on the SQLite node and specify the database you are using. Then, in the DB Viewer, click Connection → Manual → SQLite. Enter the same database name that you put in the SQLite node, then click “Create”.
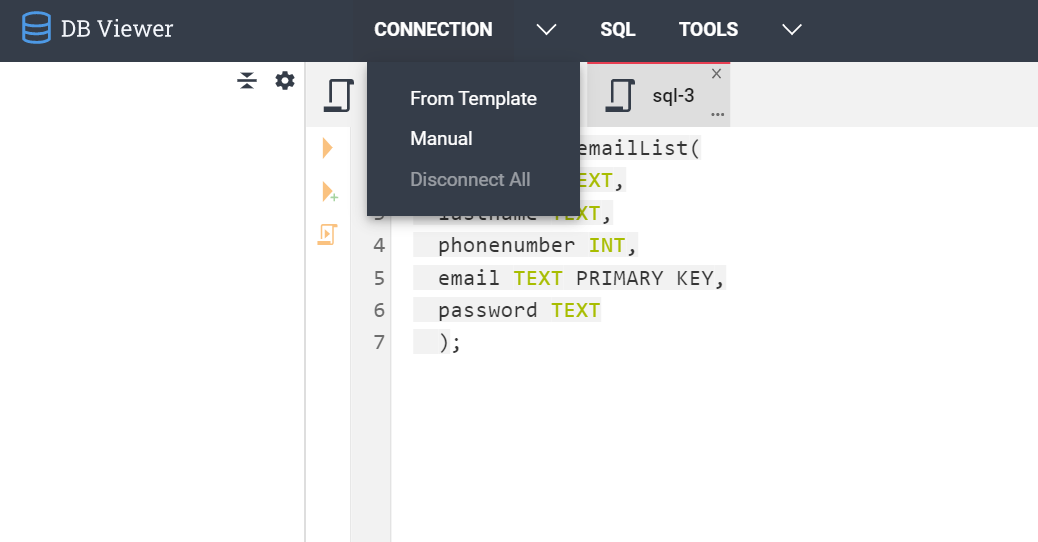
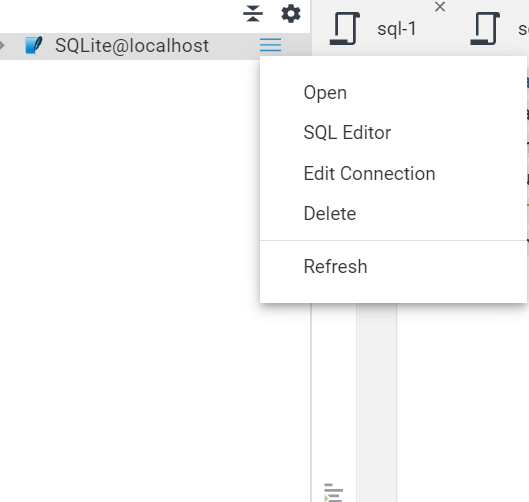
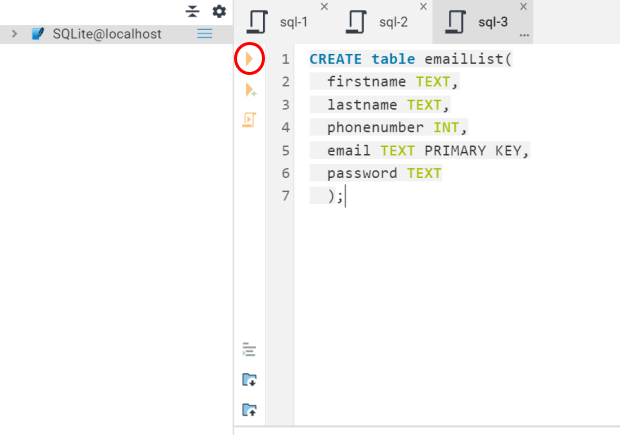
Step 4: Click the hamburger icon next to “SQLite@localhost”, then click “SQL Editor”. Here, write the code to create a table with the appropriate columns to store the inputted data. In this case, those columns would store the first name, last name, phone number, email, and password. Once you have done this, click on the first orange triangle on the left side of the editor to run the code and create a table.
Step 5: Open the Page Builder Handler node from before. Set msg.topic equal to the SQLite code to insert data into the database. Make sure the column names match what you entered when creating the table. To get the entered data values, use the name of the constant from earlier + “.” + the name attribute of the data you want to insert. Save, and deploy your changes.

Login page
Step 1: Create a new Page Builder node with the “Welcome Back” theme. Again, add a “Name” attribute to all of the input boxes, add a new action to the form, then click out and add an SQLite node with the same database name, as well as a console node.
Step 2: At the end of the SQLite node, add another “PageBuilder Handler” node, followed by an “http” node. In the first PageBuilder Handler node (the one that is automatically created when you add an action), again, write the code to retrieve the data from the form. Also, through msg.topic, write the code to get the email and password from the database.
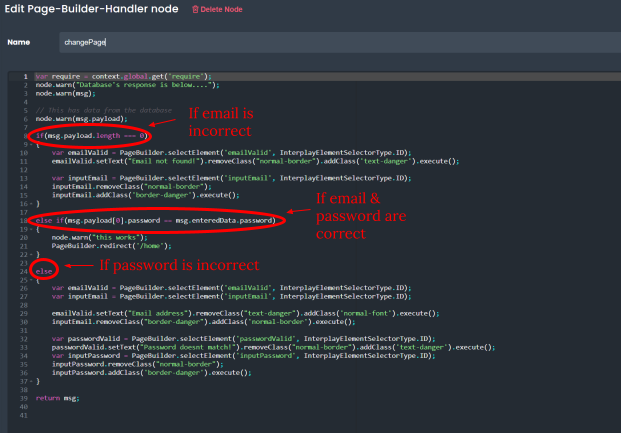
Step 3: In the second PageBuilder Handler node, your code needs to account for 3 cases.
First case: The email does not exist, and therefore “msg.payload” will have a length of 0 (the code you had written in Step 2 will be unable to retrieve the email and password).
Second case: The email exists, but the password entered by the user doesn’t match the password in the database.
Third case: The email exists, and the password matches.
It is up to you what you want to do in each case. In order to redirect the user to a different page once they have correctly entered the password, use “PageBuilder.redirect” in the third case.
Changing text on login page to show error messages:
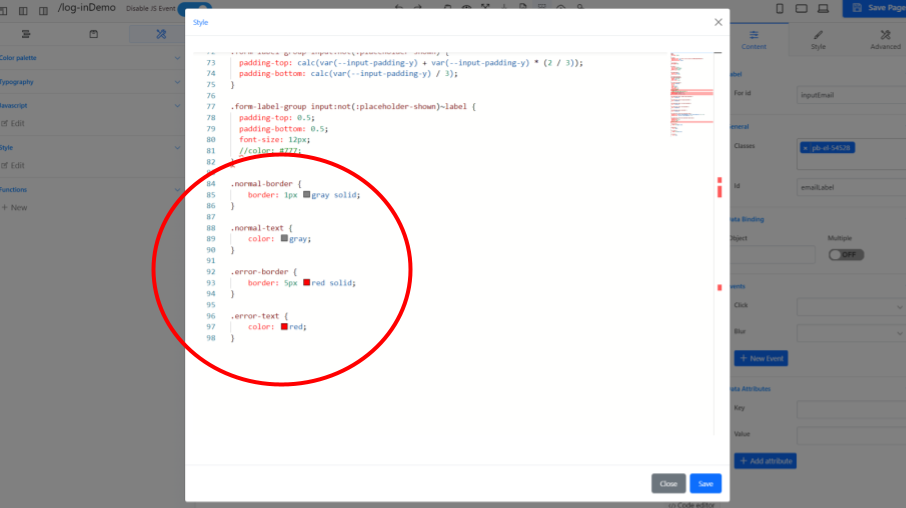
Step 1: Go to the PageBuilder node and give the inputs and labels (which currently say “Email Address” and “Password”) an id. Then, using the style editor on the left side, create 4 classes. Two of the classes should deal with the color and thickness of the border around the inputs. One should have a thick red border (indicating an error), while the other should have a thin gray border (the normal formatting). The other two classes should edit the color of the text. One should make the text red, while the other should make it gray.

Step 2: Open the second PageBuilder Handler node, with the 3 cases. For the cases where either the email or password is incorrect, create variables which represent the input boxes for email and password as well as the labels (this means 4 variables per case).

Step 3: Use “removeClass” to remove the classes which keep the font and border normal from one input/label set, and remove the classes that font and border thick red from the other input/label set. For example, if you are coding the case where email is invalid, then remove the normal font/border classes from the email label and input, and remove the error font/border classes from the password label and input.
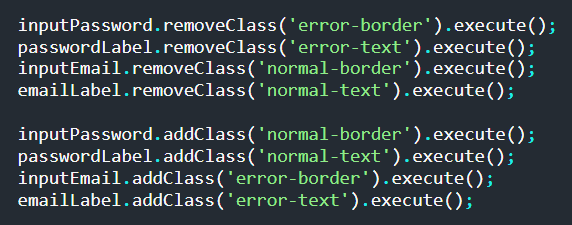
Step 4: Add the error font/border classes to correct label and input, and add the normal font/border classes to the other label and input. Also, use the “setText” method to change the text from “Email Address” or “Password” to an error message. Save the code and deploy your changes.

Videos
Part 1: Making the Create an Account page
Part 2: Making the login page
Part 3: Adding the error messages and formatting